Using F# to power an AWS IoT Button
One button, infinite possibilities
Recently, I got an AWS IoT Button as a gift. These buttons are the hackable equivalent of the Amazon Dash Buttons: a device sold by Amazon with a single button to press that will order an item for you. With the IoT Button, you can have that button press do anything your heart desires. The button typically is powered by an AWS Lambda, which is a small amount of code that you host on Amazon Web Services. No worries about setting up a server or anything like that ' just put your block of code on AWS and Amazon does the rest.
Now, my favorite programming language these days is F#, which is a functional programming language in the .NET environment. Thanks to the recent announcement that Lambdas now support .NET Core, I figured I could try and use F# on this thing. So to put it all together, I decided to try and string a whole bunch of relatively cutting edge technologies together:
- An AWS IoT Button: the device that will register a button press and somehow something on the internet will happen
- An AWS Lambda: the way the code will be hosted that runs when the button is pressed
- .NET Core: the new version of the .NET framework. Unlike traditional .NET, .NET Core can run in non-Windows environments. Unfortunately many packages for .NET don’t work yet in .NET Core, but what are you gonna do?
- F#: okay this programming language isn’t cutting edge, but only recently did .NET Core support it.
The last decision was what to have the button do. I have seen a particular meme show up a lot on Twitter in the past few months, and I figured why not have a tweet go out with that meme every time I pressed the button. So the goal is that every time I press my button, an account will tweet the “nut button:”
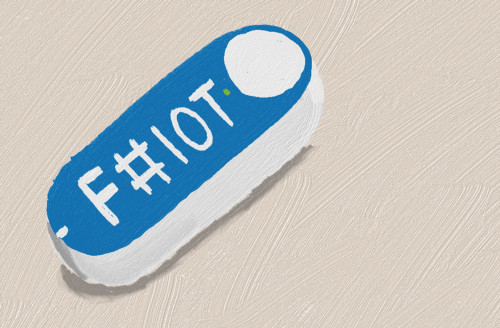
 The physical world and electronic world collide
Setting up the button
I basically just followed Amazon’s guide to setting up an AWS IoT button. I created a blank Lambda and had it connect to an AWS IoT trigger. To configure the physical device, I had to hold the button for fifteen seconds which created a Wi-Fi SSID that I had to connect to with my computer. Once connected I put in my home Wi-Fi SSID and password, as well as some certificates I created as part of the Lambda setup. I did have trouble as one of my computers was unable to connect to the Button’s Wi-Fi, but switching computers and browsers fixed it. When I was getting frustrated trying to connect to the Wi-Fi, I saw that Amazon created an app just for setting up IoT buttons. Unfortunately I found the app even more cumbersome than trying to connect to Wi-Fi, so I would recommend against using the app.
Setting up the code
Installing .NET Core
To get .NET Core working, I downloaded the command line Windows version. I could have gotten the Visual Studio version since I have that installed, but I figured I would embrace the .NET Core lifestyle and not use giant bloated monolithic software to do my coding. This was a painless installation, thanks Microsoft. You just download the installation file and run it and congrats you can create and run .NET Core code.
Making any F# program in .NET Core
With .NET Core installed, my next step was to try and get any F# code working with it. I followed this guide on Medium, which was extremely helpful. Honestly I just stopped at the video the guide linked to from Microsoft. Basically you just create an F# project with a single command line call, run it with a single command line call, and publish it with a single command line call. It was great, except when it came time to build the hello world F# program, which immediately ran into an error. When the framework fails to successfully build Hello World, it’s a sad day. After putting down the project for a day in frustration, I rolled back to a more stable version of .NET Core and everything was fine.
Making a F# program to tweet an image
First, I made a new Twitter account for the button. Once the account was created I logged in and went to https://apps.twitter.com then created an app for the button. I then created an app for the button to use, and got the four keys for it to use. The keys are: ConsumerKey, ConsumerSecret, AccessToken, and AccessTokenSecret. For this article’s purposes, the differences in these keys is unimportant. I had done this a bunch of times making Twitter bots to the point that this step was second nature. If you are just starting to code with the Twitter API, then get ready to do this step on every project.
Since I have experience in making F# code that connects to the Twitter API from several Twitter bots and my baby, Tweet Mashup, this was easy. I used the Tweetinvi package to pull tweets, and I used a template for making my code in the right format for an AWS Lambda. Here is the whole 25-line program.
namespace NutButton

module Program =
    open System
    open System.IO
    open System.Text
    open Amazon.Lambda.Core
    open Tweetinvi.Core

    let getImage (url:string) =
        let client = new System.Net.Http.HttpClient()
        client.GetByteArrayAsync(url)
        |> Async.AwaitTask
        |> Async.RunSynchronously

    let handler(context:ILambdaContext) =
        Tweetinvi.Auth.ApplicationCredentials <-
            Tweetinvi.Auth.CreateCredentials(
                getVariable "ConsumerKey",
                getVariable "ConsumerSecret",
                getVariable "AccessToken",
                getVariable "AccessTokenSecret")

    let getVariable varname =

        System.Environment.GetEnvironmentVariable(varname)

    let handler(context:ILambdaContext) =
        Tweetinvi.Auth.ApplicationCredentials <-
            Tweetinvi.Auth.CreateCredentials(
                getVariable "ConsumerKey",
                getVariable "ConsumerSecret",
                getVariable "AccessToken",
                getVariable "AccessTokenSecret")

            let image =
            "[http://content.jadler.info/NutButton/nutbutton.png](http://content.jadler.info/NutButton/nutbutton.png)"
            |> getImage

            Tweetinvi.Tweet.PublishTweetWithImage("NUT BUTTON",image)
            |> ignore
And here are some details on how the code works:
-
getImage: this function takes a url and downloads the image from it as bytes. This is used to get the image to embed in the tweet. It uses the .NET HttpClient to pull the bytes of an image. The GetByArrayAsync returns an Async type, but since I want the code to run serially I put in the AwaitTask and RunSynchronously.
-
getVariable: this function takes the name of a key gets the key associated with it. I stored the keys as environmental variables (I’ll get to why in a second), but originally I just hard coded them ≡ƒÿ▒.
-
handler: this function is what is called by the Lambda. It takes a context (which I totally ignore) and returns nothing. Inside the function I set the credentials to use the four keys from my Twitter app, and then publish a tweet with an image. I hosted the image on my personal website to pull from.
My project.json file contains references to packages for Tweetinvi and for the AWS Lambda stuff to work. Honestly I probably didn’t even need all of these dependencies, but I copied and pasted a fair amount of this.
{
    "version": "1.0.0-*",
    "buildOptions": {
    "debugType": "portable",
    "outputName": "NutButtonLambda",
    "emitEntryPoint": true,
    "compilerName": "fsc",
    "compile": {
        "includeFiles": [
        "Program.fs"
        ]
    }
    },

    "dependencies": {
    "Newtonsoft.Json": "9.0.1",
    "TweetinviAPI": "1.2.0",
    "Amazon.Lambda.Core": "1.0.0*",
    "Amazon.Lambda.Serialization.Json": "1.0.0",

    "Amazon.Lambda.Tools" : {
        "type" :"build",
        "version":"1.0.0-preview1"
    }
    },

    "tools": {
    "dotnet-compile-fsc": "1.0.0-preview2.1-*",
    "Amazon.Lambda.Tools" : "1.0.0-preview1"
    },
    "frameworks": {
    "netcoreapp1.1": {
        "dependencies": {
        "Microsoft.NETCore.App": {
            "type": "platform",
            "version": "1.1.0"
        },
        "Microsoft.FSharp.Core.netcore": "1.0.0-alpha-160629"
        }
    }
    }
}
Putting my code into the AWS Lambda
To get the code in AWS Lambda, you simply run “dotnet publish” in the command line, zip the results, and upload them to your Lambda from the AWS console. In the console you can set environmental variables, which is where I store my Twitter credentials. This took a few tries to get right, but it turned out it was because I accidentally had a leading space in one of the keys. For the handler, I used: NutButtonLambda::NutButton.Program::handler, which is TheNameOfMyProgram::TheNamespaceInMyProgram.TheMethod::TheFunctionToRun. And that was pretty much it!
Results
The Twitter account @nutting_at_2313 now tweets every time I press the button. As a last step I put an appropriate sticker on the button and took a photo:
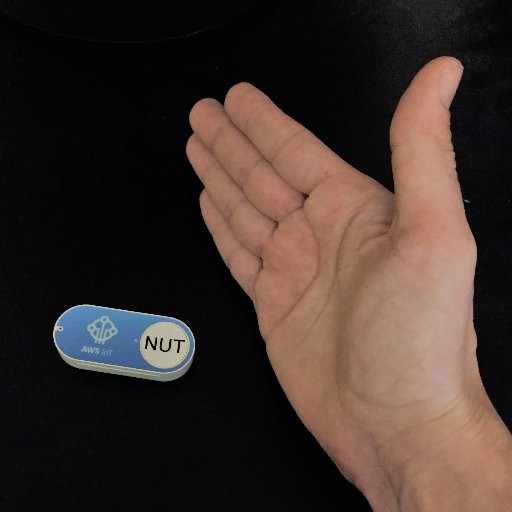 It took a lot of tries to make it look like the meme
I would summarize my experience as “pleasantly surprised.” While I hit a few hiccups (setting up the button Wi-Fi, building an F# project successfully, getting my keys typed in right), overall it was a success. And the minimal number of lines of code I had to right was shocking. I would definitely recommend people check out making Lambdas in F#, and using F# for IoT Buttons.

Here is the GitHub repository for the code. Note that I altered the code to not use environmental variables and instead use a JSON config file.